Sunday, July 31, 2011

Found the Perfect Earrings for My Wedding!

This weekend has been CRAZY!  My friend Brad aka my Man of Honor wanted me to go shopping with him for a shirt to wear to my wedding.  So what started out as a simple little shopping trip turned into a huge production because we managed to change my mind about the dresses of the bridesmaids.  My original idea of having everyone wear a different colored dress that they already own was not working out so well, since it turned out that the dresses are made of different fabrics.  One is all satiny and one is more cottony.  I just really don't think that would look cohesive.  The other friend was going to buy a new dress anyway.  So, with the help of Brad, I decided to just pick a color/dress and have everyone wear matching dresses.  It's just easier that way and will look more put together, even though I still think having different colors would be fun!  But that also may back fire even if they are the same dresses in different colors.  I decided to just play it safe and chose a very pale powder pink type of color.

I wanted a flowy romantic looking dress.  But boy it is hard to find!  We literally went to 3 different malls and countless number of stores and just couldn't find one.  Of course I don't want my friends to spend too much money either so that also makes it harder.  So now I think David's Bridal might actually be the top choice since they have lots of different colors to choose from and the prices aren't that expensive.  This dress shopping process is rather stressful, I never knew I saved myself so much trouble by letting them wear their own dress.  But now I just created even more headache by changing my mind at the last minute!!  Less than 2 months left................

Anyway, so in the midst of my crazy shopping weekend (I also went to yet another mall and shopped more today), I did find the perfect pair of earrings for the big day!  And they are pink!  How perfect, that will match the pink of the girls dress that I haven't picked out yet.  They also come in purple which are very pretty too.

They are from Swarovski, and they are called the Nina Vintage Rose:


They look very feminine and delicate in person.  The close up picture may show it better, but there's a white bow on top of the crystal.  It's super cute.


The pink of the crystals in person is very faint, which will go well with my white dress.  I have dark hair so they really stand out and are very eye-catching.  They are pretty sparkly in the light, and I think they are the perfect size and sophistication for the look I'm going for.  They are also very comfortable on because they are very very lightweight, I can't even feel them actually!  Kind of worrisome because I could lose them and not realize haha.  They are about 2.5 inches long.  I originally wanted something that is maybe 1-1.5 inches long, but I don't mind this length at all.  Here's what they look like on a real person:


I think they enhanced the color of the pink in the above photo, because they are definitely lighter than that on me.  I'm really happy with them, and they were $75 which doesn't break the bank.  At least one purchase from this weekend went well... maybe I used up all my shopping luck with the earrings that I don't have any left for dresses!  Let's just hope they will turn out ok...


Friday, July 29, 2011

Lululemon Pearl Luxtreme Cool Racerback... Not A Huge Fan!

So I got the Pigeon Pearl Luxtreme cool racerback from Lululemon recently, and I was able to take it out on a "test drive" yesterday. 


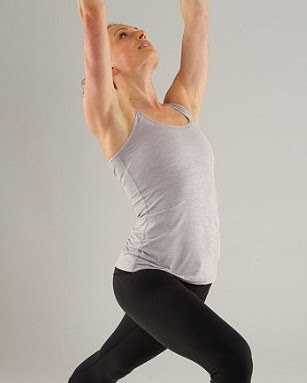
I was initially excited about this tank because I really like the color and the subtle "pearly-ness" in the fabric, and the material felt nice and silky to the touch.  It's a great neutral to have other than black, white and coal.  I also like the reverse side stitching contrast with the pigeon color.  It's the perfect color for summer and goes with pretty much everything.


But after my workout I really was not impressed and am now kind of wishing I hadn't used it already so I could return it.  The material felt a little too thick and stiff when I was doing cardio and weights yesterday.  It reminded me of the old Lullure fabric Lululemon used to make which I have in my older Dance Strap tanks.  While I like the sheen that the material gives in those tanks, I never wear them for hard workouts because the material is heavy and the tanks are rather low support and low cut.  So I normally just wear them to pilates or yoga, and they are fine for that.  I think pearl luxtreme is slightly thinner than lullure, and not as stiff.  But this material and fit were just not to my liking. Not to mention it kept creeping its way up as I was moving around.  I wasn't even wearing luxtreme bottoms!  When I wear my normal cool racerbacks to workout in, you can usually see a good inch or two of the front of my bra underneath and the tank never moves up.  But yesterday the tank creeped up so much that the bra was completely hidden at one point.  When I looked at myself in the mirror, I noticed that the whole body of the tank had moved up by a few inches, there were so many wrinkles on me I felt like a bull dog.  And it stopped at a really unflattering point where the light was hitting the shine in the fabric, it created a shadow along the stomach giving it a pooch look.  Seriously I thought I was either really bloated or preggers for a second.  It may have been a unfortunate lighting coincidence, but it didn't make me feel too cute.  

I will give this tank another shot later to see how it works as I do still love the color.  If it performs under expectations again I will likely be selling it.  I have 2 dressers with total 6 drawers dedicated entirely to my cool racerbacks and other Lululemon tanks and bras, but I still have a hard time closing the drawers sometimes.  So I really need to reserve the space for only the ones I love (yes my drawer space is premium real estate!). 

Tuesday, July 26, 2011

Passed the CFA Level 2 Test!!!

I am still in disbelief from the email this morning saying I passed the CFA level 2 test I took back in June!  I was CONVINCED that I had miserably failed it.  In fact, I had about 3 dreams last night with various scenarios of how I got my "sorry you did not pass" emails.  Each of them was so vivid!  So when I actually read the real results this morning, I was so surprised!  Pleasantly, of course!  This means I have only one more level to go before I can put "CFA" after my name!  I believe I will have one of each of the drinks below please!  =D


I don't know how well exactly I did, since they don't release actual scores.  But they do provide a rough percentile breakdown per topic area.  I actually didn't do so well on 3 areas.  Though they are the areas that are worth the least amount of points.  And I did above average in highly weighted topic areas.  So I still have no clue whether I barely passed or killed it.  And I guess I don't really care!

I told myself before I found out the result that I would not continue pursuing this designation if I fail.  Because it takes almost 6 months of constant work/study/work/study/work/study, that it's exhausting!  I just didn't know if it would be worth it.  I was kind of looking forward to not having to study anymore next year.  Haha.  But now I have to take level 3 next June.  This is the point of no return now that I have 2 levels behind me.  At least I can enjoy my summer and holidays, and not worry about it until at least January next year!

This is such a big load off though!  And the best part is I now can get reimbursement money back from work!  They only reimburse exam and study material fees after passing, of course.  And I spent close to $2000 for everything.  That's a nice chunk of cash to buy myself something nice!


Sunday, July 24, 2011

Lash Extensions & Love Token Waterfall Cardigan

I've had a pretty busy week... pampering myself!  I've had a facial, massage and lash extension within the last 3 days.  I finally took the plunge and got lash extensions and I'm quite happy about it.  I have been meaning to try it out forever and saw a recent Yelp deal for $150 at a place in Pasadena with high ratings so I decided to just do it.  They isolate each single lash and adhere a lash extension to it.  It's quite a time consuming process, but for me it only took about 1.5 hour.  It's kinda tough to keep your eyes closed the whole time.  I sort of drifted to sleep here and there.  And then you wake up with a wonderful set of long, full and dark eyelashes!  No mascara needed haha.  I'm kind of amazed that I can wash my face and do all my normal stuff, and I don't even feel them.  The best part is I can roll out of bed, put on some BB cream and be ready to go out and about!  I even look much better while working out.  I opted for a longer and fuller look while still keeping it natural looking since I do have to live with it going to work and stuff, I don't want to look like I'm going night clubbing!  I can't even tell how they managed to add an extension to every single lash.  The procedure is expensive though, at $300 normally for a full set.  And $85 for each refill which you will need about once a month depending on how you keep it up.  They have tons of different lengths, thickness and curl types, so I think I'll keep it up at least until my wedding.  Maybe I can get a more dramatic "come-hither" look for the wedding day.  Hehe.

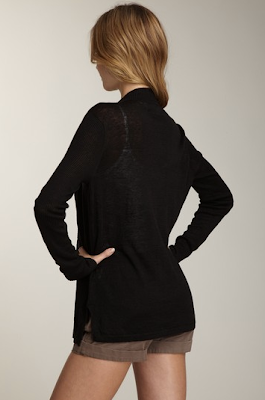
Anyways, so the last of my wrap/cardigan obsession from Hautelook arrived at my door step yesterday.  It was the Love Token Waterfall Cardigan, in black.  Out of all the wraps I have in my closet, I don't have a simple black one.  So I felt that was essential to the end of this saga.


Well it is pretty much what the picture shows.  A thin black open front cardigan.  It's made of 100% linen, so it's not the softest material.  I hope it won't be too scratchy to wear with just a tank under.  I bought it because I liked the fit and the fact that it's semi-sheer.  Perfect for the weather now.  I also can wear it to work as well as to yoga or something.  Love the versatility of these wraps!  But I really am going to stop buying these things like they are going out of style.

Wednesday, July 20, 2011

Shae Blowout Sale from Hautelook

I think I've been binging on knit wraps and shrugs lately!  Aside from the ones I already bought over the past few months, I bought 2 more during the Shae blowout sale on Hautelook, and I have another one coming.  I really don't know what it is!  I just love them for work when we don't have to wear business professional outfits.  They are perfect for more casual summer days, and they can work as work clothes or casual wear.  So here are my latest wraps that just got delivered today:

I like this one for the light and airy look - I would wear it to work pretty much exactly how the model is.  With a simple tank under and some slacks.  I think it could work with white pants too!  I only wear white pants occasionally to work though haha.  The material has a pretty soft cottony feel, I think it will be comfy.


This one I think I can only wear to work on super casual days, like a Friday before a long holiday weekend. Just because it has drawstrings which make it look more casual.  I actually really like this model's outfit.  I could totally copy it.


This one is actually sewn on the front and doesn't open up.  But the waist strap can pulled and be adjusted.  The color in person actually looks slightly more olive green to me.  I like it, just was a surprise to see it since the photo shows a tan color.  Again, it will be cute to wear with slacks to work or with jeans like the model is.  I really like how they styled these models!  Maybe that's why I bought these!


So I think once I get my next wrap that's coming in the mail right now, I will need to lay off of them for a while!  I think I have something like 15 different wraps right now and really don't need anymore, like ever!  I really should be buying more suit jackets but for some reason hate spending money on "work only" type of outfits.  However, Calvin Klein has some great sales going on right now and I am absolutely in love with my blazer I got from there, so I think I will get another in a different color.  Those blazers fit so well and they really can be worn with jeans too because the sleeves can be rolled up and show the cute stripy lining!


Sunday, July 17, 2011

The Wedding Invite Process

I just realized that I haven't posted a Sunday Funday in a while!  I've been super busy and have not been taking pictures.  I know it doesn't take long to snap a quick photo, so I suck I guess.  Hopefully I'll get my act together soon!

Well, I wanted to write about the process of creating my wedding invites, envelopes and stamps, because I spent a lot of time on them and I just sent them out last week.  I wanted to post a picture of it, but there are so much personal info on it, that I would have to redact a lot and it ended up looking like a top secret government doc.  So... no luck there.  I will say though, that I created it in Photoshop from scratch, and it has 2 poems on it written by my grandpa and grandma.  My grandma has beautiful handwriting, and she wrote them on paper.  So I scanned them and was able to use her handwriting on my invite which was very cool.  Then I found some pictures on google of cherry blossoms and branches, and I was able to fit everything on one 9X4 horizontal paper.  Originally, the whole idea of having everything fit on one horizontal page was so that I could make them into scrolls.  I saw some scroll invites at that bridal expo I went to a few months ago, and thought they just looked so cool!  I was dead set on it for a while, but once I received the printouts of my invites, I liked them so much the way they were that I decided not to bother rolling them up.  I've been getting so many compliments on them about how personal and how different it is from anything people have seen, so I'm very happy with it!  In fact, some people refuse to send back the RSVP cards because they want to keep everything!  I also have a wedding website, so some choose to RSVP there as well.

I found this guy online who printed them for me on hemp paper.  The paper is really cool... it is an ivory color and has some texture to it.  I first found his website when I was looking for some kind of rice paper online, and came upon some sample printouts he had on hemp paper which looked gorgeous.  His site is called Hemphasis.net and he was super responsive and did a great job.  Seriously I could not have asked for a smoother experience.  He even shipped me a free sample so I could see the paper and how my invite looked before ordering bulk.  So I would highly recommend this guy for any print work.  I had him print 70 invites and 70 RSVP cards on high quality printer, and cut to size.  His cost was so reasonable, I spent about $150 on everything after shipping!  And I got them within a week.  Here's some samples from his site of different stuff printed on hemp paper:  Though the paper I printed my invites on were a much lighter color.


The paper is the same thickness as a greeting card.  So to reinforce my invites, I had to go to Michael's and buy card stock and spray glue.  Then I went to Kinko's and cut them into the sizes I needed.  When I got home, I spray glued the cardstock onto the back of each invite and RSVP card.  That was kind of labor intensive, but didn't take horribly long and I did everything in one night when I got home from work.  I didn't want my invites to bend in the mail so it was worth it!  My only faux pas with creating and printing everything on my own was I didn't size the RSVP cards well.  I meant to make the RSVP cards kind of like a smaller version of a post card.  I had printed my address on the left hand side, and left some room for a stamp on the top right corner.  However, I did not leave enough room to fit my stamp property, so I had to totally throw out the idea and order envelopes for the RSVP cards.  It set me back about 2 weeks!

I used Vista Print to customize and print my envelopes.  They actually had some cherry blossom themed envelopes which worked perfectly with my invites.  I got the regular letter sized #10 envelopes in white (when I created my invites in Photoshop, I made sure to size them so that they could fit into a regular envelop), and smaller RSVP card A2 envelopes in pink.  It was my first time using Vista, and it was actually pretty cool how customizable all their products are.  I was able to print whatever I wanted on the front or back of the envelopes.  And the cost was not bad at all.  I think something like $30 for 100 envelopes.  Of course the envelopes are nothing special - I would have preferred the paper to be a little thicker but whatever!

I also printed seals with Vista Print using one of my engagement photos because it was only $10 for 100 seals!  It actually turned out great and I really liked it.  This website also prints many other things like post cards, return address labels, business cards, etc. and they even make websites for you.  It's pretty cool for a small business or an event.  The only thing I didn't like about this site was shipping was way too $$$.  I paid $20 for "expedite" shipping which I received my product 2 weeks later.  That's not very expedited in my books.  And they could have easily put my envelopes in a flat rate box with the USPS for $4.95.

Here's what my envelopes and seal looks like!  Again for security reasons, I redacted our names and address on the seal and return envelopes.


Invite #10 Envelopes - the back side says "We are getting married, please come to our wedding"  =)

Seal using engagement pic

RSVP Card Envelopes


I also printed out customized stamps from stamps.com.  Funny enough, they are a client of my old firm so I knew their business.  It is based in Marina Del Rey here, and they have a contract with the USPS to print out stamps so it's totally legit.  They actually make a lot of money.  It's a neat idea that you can upload any photo and make it into a stamp.  Then you can either print the stamps out yourself on your printer, or have them print it out for you and pay for shipping.  I chose the latter because I did not have label paper and shipping was cheap.  Plus, I wanted the "teeth" side of the stamps to be cut right.  I printed out 160 stamps total - 80 of one pic and 80 of another.  This way I could have one stamp for the outer envelope, and another stamp for the RSVP card.  It's not cheap though, basically you are paying about $1 per stamp.  But you get a minor discount as your # goes up.  It still adds up though.  But since I spent so little on everything else, I felt it was definitely worth the splurge on this one.  The print job and shipping was super fast for this service, I received everything in 2 days!  Definitely give them props for being efficient.

So here are my 2 stamps.  Aren't they cute??  I know it's hard to tell on the computer, but in person the photo qualities look great for such small stamps!


Ok so that was everything I did for my invites.  I thought it was really fun doing everything on my own, and it turned out a lot more economical than paying someone else to do it.  I don't think I would have achieved the personal touches if anyone else were to do it anyway.  Altogether, I think I spent somewhere between $350-400 for everything, including the stamps.  From what I've found by looking at different vendors, that is marginally cheaper than anything I could have paid for.  I still have invites, envelopes and stamps left over too.  I ordered more than I needed "just in case".  It's kind of a waste with the envelopes since I put "please come to our wedding" on the back of them, I can't use them for any other occasions.  I guess I can keep the small pink ones but how many times do I really have to send people self-addressed envelopes?  I could always use the stamps though, especially for Thank You cards to send out after the wedding.  I have not even started creating those yet, but I think I will keep the theme similar and go back to the hemp guy for printing.  

I know it's kind of lame that I can't post a photo of the actual invites and RSVP cards I made.  But hopefully my documenting this process will help another DIY bride-to-be!  It really wasn't hard at all, just have to be organized and creative to save bundles!  Most importantly, it is FUN!


Friday, July 15, 2011

Creme Brulee Torch Set!

I had some credit for a return I made on Beyond the Rack a long time ago, and I was finally able to use it.  I ordered from that site twice, and I really will try to not shop there much in the future because I can't take how slow the shipping is.  I think it takes minimum a month to receive something.  So only order stuff you can live without for a while.  Like my new creme brulee torch set I got!


Let's be honest, I am in no hurry to make creme brulees!  But I sure do love them.  In fact, I love them so much that I'm having a chef come to my wedding and make creme brulees for everyone instead of having a wedding cake.  LOL!  It will be awesome.  Who needs cake anyway, I rather splurge my calories on creme brulee and alcohol.

I used to have a creme brulee set with ramekins and a torch but the ramekins were much smaller and shallower.  I made creme brulee once, and I remember it was really really good!  And fun to torch the sugar!  But that was so long ago I don't even remember where they went.  This set came with 4 ramekins, all pretty deep.  So I'll have to try making some again!  They say I can also make melting cheese and meringue pies, etc. with them since they are oven safe.  This set was $29 and a pretty good way for me to spend my credit on, as I just wanted to use credit up without giving them more of my money.

So I was perfectly fine this time with the order taking a month to arrive.  I also ordered some pillows though in order to completely use up my credit, which I was hoping would get here earlier, but they are still not here yet.  So be warned, if you are going to order from this site, be VERY patient!


Wednesday, July 13, 2011

Lululemon Astro Wunder Under Crop Review

So I finally got my Astro Wunder Under Crop back from hemming yesterday and I was able to try them out during my workout last night.  But first of all, since they refused to hem the crops to cut off the Lulu logo, they took it up as much as they could, and this ended up being the result.  I am NOT happy with this:


Seriously???  I think this is where the seamstress should have taken liberty and moved it up by like 2 centimeters!  I can't imagine that Lululemon would rather have their clothes look like this than to cut off the logo completely.  I'm just annoyed that I had to wait over a week for this, and now I probably have to take them back again.

Luckily though, the logo on these crops are not the regular silver reflective logo, but a rather darker chrome colored one.  Against the dark pant color, it is not all that visible.  Still though, just because I know it's there, it bugs me.  This is not the greatest pic, but you can kind of see what it looks like on me:


Ok, so that sucks.  But I do really like these crops though.  I really really like the color.  I know it's not a far stretch from black but it is different.  In case anyone is wondering, this color doesn't really show sweat either.  Maybe the coverage is not as good as solid black, but you can't really see any wet marks unless you inspect closely.  The waistband is very comfortable, but it is a little looser.  Hmmm maybe I should have got my regular size 4 instead of the 6.  But the rest of the crops seem to fit fine, like around the bum and legs.  So there's no danger of them falling off or anything.  I ran a 5k with them on and they didn't really move so I'm good with that.  I guess it just feels weird that the waistband is not tight like my other crops.  A major pet peeve of mine while running or anything else, is when I have to constantly pull up my pants.

I really wanted to wear them to do yoga, but I was running late and missed yoga class.  So I just ran and did weights.  But I think if they didn't fall down or move around much while running, then they are most likely going to stay put for yoga as well.  I thought they were very comfortable, and I'd definitely be tempted to get another pair if a great color combo comes out later.  I hope these are here to stay, because it's a great hybrid between 2 of my favorite Lulu crop styles.

I actually wore these yesterday with the one side of the waistband rolled down, just to try it out.  Like I said, it stayed in place pretty well so I was pleasantly surprised.


I wore my static very violet/very violet cool racerback inside out with them.  Very violet is VERY similar to dew berry.  So with static very violet, very violet, dew berry, and dew berry wee stripe (?) all in one outfit, I had lots of purply hues going on!  Oh I also wore my very violet 50 Rep bra.


I kind of liked the part of the waistband poking under from the cool racerback.  If I didn't roll the waistband down, there would be no way anyone could see the waistband but me, since the cool racerbacks are so long.  I took a pic from the back view too, with the tank lifted up a little, so you can see all the different berry colors!

Oh hi there butt cheeks!

So the verdict is positive.  Now only if they didn't make the stitch across the logo!!!  I'm going to go back and show them, and hopefully they will let me just hem off the damn logo completely.  I prefer no logo on the leg, because sometimes I wear my wunder unders out as street wear.  The visible logo would push it over to the athletic wear only side.  We'll see.  Maybe I'll try out a different store because I know for a fact that policies are inconsistent among stores!


Sunday, July 10, 2011

More Wedding Stuff - Umbrellas and Robes!

I recently changed my mind about my bridesmaids at my wedding.  I think a week or so ago when I wrote about the sashes I made for them, I said that I didn't want them to stand up there with me nor walk down the aisle with me.  The main reason for that was a lot of drama with one friend basically.  Long story short, she insisted to be my maid of honor but stubbornly declared that she will not do one thing to help.  And she hasn't.  Basically she wants the honor but none of the responsibilities.  My fiance and I are pretty much doing everything ourselves anyway, but I just don't like her attitude.  So I did not want her to be up there with me at all, and to avoid drama I decided to just have all my friends sit at the sides instead during the ceremony.  But then I thought about it some more, why should I compromise my wedding for her???  It's my wedding after all.  To put it simply, she can go F herself if god forbid she doesn't get her way.

So I decided to scratch her off from being my "maid of honor", and instead chose my gay friend to be my man of honor.  He's a much better friend anyway, and he's helpful and not selfish!  It just so happens that my fiance has a very good friend who is a girl and he'd like to include her as his grooms woman.  So it's perfect, they can walk down the aisle together.  My fiance's brother will still be his best man though.  So I guess my man of honor and his grooms woman can walk down together first, then his brother will walk down with one of my friends and then switch places with the grooms woman.  Lol.  It will work out.

I will still keep my selfish friend as one of the bridesmaids, but she may not even get to walk 2nd, or even 3rd.  She doesn't even plan to come to my rehearsal dinner!  I'm actually really surprised she already booked her ticket and hotel.  But she's flying in the morning of my wedding, so if something happens then I guess she just won't show up at all.  Can you imagine this girl being someone's maid of honor?

I think I will still have my friends wear completely different colored dresses with the sashes I made tied around the waist.  I thought about getting them bouquets, but then the idea popped into my head of having them hold paper umbrellas instead!  I don't know if I have seen that idea before or what, but it just came to me and I think it will be great.  So today, I went to downtown to meet with some out of town friends and then stopped by Chinatown on the way back home.  I knew it would be the place to go for paper umbrellas.  And sure enough, there were tons of stores that sold this kind of stuff.  I found this really pretty umbrella which is actually made of nylon, not paper.  But I think it will do the job, and will be less likely to tear.  The owner cut me a deal and sold them for $3 a piece.  So I got 5 umbrellas for $15!  Much cheaper than bouquets lol.


I think that my man of honor will carry the umbrella too, even though it's kind of very girly.  But maybe he can just try to hold it up for me instead.  I won't actually carry one since I have my bouquet that I made.  But I still got one for myself for pictures.  My fiance's grooms woman said she wants to stand there like a man without the umbrella.  It will probably be better this way, since the photos will look more even.  It would be a little strange if she was the only one on the men's side with an umbrella.

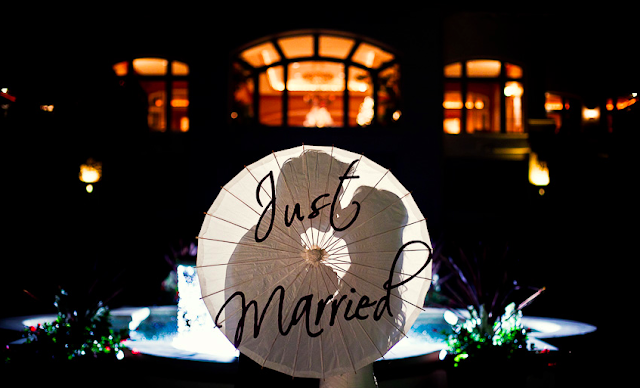
Check out this picture I found from Lin & Jirsa - amazing wedding photographers located in Orange County.  Believe it or not, they were both my coworkers in finance before venturing into wedding photography!  Good call... they are very very talented.


So while I was at the store, I also picked up about 10 paper lanterns!  Some of them are round and some are rectangular.  They are all mostly white paper, but some have cherry blossoms and bamboo prints on them.  They will be perfect to hang on the tree branches outside of the Lake Tahoe house.  I think that will look very romantic, and they only cost $3 a piece too!

I think these prices are pretty good, because I looked online and they were more expensive or around the same price but I'd have to pay for shipping.  

So then as I was leaving the store, I saw these silk colorful robes.  Then I remembered that I saw some wedding photos on this blog I read which had the girls all wearing robes while getting ready.  I thought that was a very cute idea.  This way the girls won't be all wearing mismatching "getting ready" outfits.  

Here are some of the photos from Chasing Rainbows Kissing Frogs:


I think that just looks lovely.  So I got 5 of those too.  I thought I'd stay true to my colorful theme and got 5 completely different colors.  I was able to bargain from $20 a piece to $12.  Lol.  Not sure if that was a good price or not but I'm not very good at bargaining so I just said fine and paid up.  Oh yeah, they all say 100% silk too.  Hmmm... who knows if that's true or not.  I thought about busting out a lighter to do a silk test and see if they catch fire.  But for some reason I didn't think the store owner would've been too happy with that, and I didn't feel like burning down chinatown.

I think I will be wearing the white one, and everyone else will just choose a different one each!  Wow all of a sudden my wedding is all Asian themed.  And the photos will be really colorful!  

The one I will be wearing


Review of My Nike Free 3.0 V3 Shoes!

So I've been using my new Nike Free 3.0 V3 shoes all week for different types of workouts, and I really like them!  Contrary to what I thought, my calves and legs are not sore at all!  I'm very surprised by that because I thought the transition from supportive shoes to minimalist shoes would be painful and take some getting used to.  But nope, I'm up and running just the same!  Literally!

I used them for running on Tuesday, Wednesday and today.  When I used them on Tuesday, I was so amazed that I could feel everything my feet were running on.  It makes you very conscious and "in touch" with the ground.  I felt that I didn't need to change my stride much - I've always been a mid-foot strider.  But I can see how these shoes would change a heel stride.  It makes sense, since most running shoes have a thicker heel, which kind of forces you to land heel first.  But these shoes are flatter in the heel, making it more natural to land mid-foot or fore-foot.  They are so much lighter than my old shoes!  I was able to run faster and more effortlessly.  The only thing was I felt that they made my feet hotter / less breathable than my old shoes.  But it could also be because of how hot it has been lately.  The back of my heel on my right foot and the back of my left calve were ever so slightly sore after my run - I don't know why it only happened on one side of my body - maybe I'm not a well balanced runner lol.  But the day after, any soreness completely disappeared.

On Wednesday, it was my 2nd run with these shoes.  I got used to being able to feel the surface I was running on, and I was not consciously thinking about that anymore.  But I did notice that I wasn't stomping my feet as much as I used to, which was what I was hoping these shoes would cure!  I also did a circuit type of workout that day.  These shoes were great for jumping around and I didn't feel any significant difference from previous shoes.  But when I did squads, it felt very different because of the lower heel of these shoes!  I felt that I had to use different leg muscles to squad down since I wasn't elevated as much.  Interesting!

Today I went to the Santa Monica stairs today, which are these steep stairs built on a hillside that lots of people go to get their exercise.  I went up and down about 10 times.  It's a pretty hard cardio workout.  Today was a bit crowded so I couldn't go as fast as I wanted to when I got stuck behind walkers.  There are 2 sets of stairs about a block away from each other.  One set is wider and wooden, going straight up and down.  The other set is cement, much narrower, and zig-zags a lot.  Some people go up and down one set of stairs, but I usually go up one set, run to the other and down the second set, then run back to first set.  Today I also added pushups and tricep dips in between.  It had been a while since I last went to the stairs, my legs were jello after a few rounds!

Here's a picture of the wooden stairs, I totally stole it from google image search.  It's just a little portion of it - it really looks like the stairway to heaven as you cannot see the top from the bottom!


So I thought the shoes were pretty good for the stairs as well.  It probably really helped that they are so light and I didn't have to drag around as much weight with me so I could go faster and longer!  I ran up and down some and walked some. Sometimes I went up 2 stairs at a time.

Oh yeah, these are also great for stretching.  Hehe.  I was rocking the 80s look today with my electric orange cool racerback and these bright blue shoes!


Oh yeah, and here's an example of how not to do push-ups.  Maybe I thought lowering my forehead towards the ground would get me closer!  Oh well, I did a million dips and full on push-ups before this so my excuse is that I was tired lol.  I just thought this was a funny picture!


So anyway, back to the shoes.  I am pretty much 100% used to them by now, it's great.  I think after this week, I can safely say that these shoes are good for running as well as other types of cardio workouts.  Of course, since these are my first pair of minimalist shoes, I have nothing else similar to compare them to.  But so far they've worked well for me, I don't think I could go back to using my old shoes!  I had originally planned to keep my old shoes around for the gym, but I think now they would just feel like bricks to me.  But I am thinking of getting another pair of minimalist shoes from a different brand so I can have some variety and switch them around!


Friday, July 8, 2011

Brita Water Bottle

I drink so much water that when I go to Vegas, I spend more money buying water than gambling.  I always carry my water bottle with me in my purse everywhere I go, like a freak.  Sometimes when I'm traveling, I even fill up my water bottle at restaurants.  My fiance thinks it's embarrassing but whatever!

So earlier this week I was chatting online with my coworker who sits right behind me and shares my love for water - ok so we were talking shit about other coworkers who sit near us and don't drink any water all day.  It was a slow day.  But he told me that he just bought the Brita water bottles which have filters built in, and when he went on a recent trip, it saved him a lot of money and hassle because he could just fill it with tap water and let the water bottle filter it out!  Woah!  I did not even know such a thing existed!  That would seriously solve all my problems!  So I jumped online right away and bought a 2 pack from Target.


And they arrived today - pretty fast and free shipping from Target!  I am so excited!  The wrapper around them is plastic so you can take them off and the bottles are just solid blue and green colors.  These are 24 oz water bottles, which is perfect to carry around with you in a purse or whatever.  And they were only $18 for both.  You can also buy individuals for $9 each, so there's really no saving at all to buy the 2 pack.  But I figured I might as well get two because I'd probably use them both anyway.  I have so many water bottles it's no joke.  The filter inside is replaceable, of course.  I think I will only be using these bottles while traveling, since at home I always have filtered water.  So I don't think I will need to replace the filter very often.  

So yeah, I'm going to Vegas in a few weeks and will definitely be bringing these!  I can't believe I never thought of looking up something like this before!  So simple and really a lifesaver for me!  I can just imagine how nice it would be in airports too!  Now I won't have to spend $5 on a bottle of water or ask the flight attendants to bring me 3 of the little baby bottles they usually give out on board.  Lol.  Yay!


Thursday, July 7, 2011

Lululemon Outward Bound Jacket

Ok I know it is now in the middle of summer and it's been almost 100 degrees here everyday.  But when I saw the Lululemon Outward Bound Jacket in white on sale on the Canadian side of the website, I had to contact the Vancouver Lulu buyer Nancy who offers her awesome services to buy and ship stuff to Lululemon nuts like me!  It was my first time asking her to buy anything for me from Canada and she was so great!  She kindly ordered it for me and shipped it to me.  I now can have this super cute snow bunny jacket sitting in my closet for the next 6 months.  Hehehe.  But I wouldn't have it any other way because I fell in love with this jacket ever since it first came out and I tried it on at the Santa Monica store.  I was sooooo tempted to buy it but eventually passed on it since it was $188 and I knew I wouldn't get enough use out of it living in the So Cal climate.  The sale price of $99 is a lot more acceptable, even though I totally forgot that the Canadian dollar is now worth more than USD.


I just really like how this jacket fits.  I put it on briefly just to remember how cute it was, even though it made me sweaty immediately - that's how hot it is here!  I got the size 4 and there's still room for another light layer underneath.  But it's pretty much the perfect fit.  It's a somewhat puffy jacket but does not make you look fat at all.  I think the back view is especially slimming, around the waistline.  There are also two zippers on both front sides that zip down and completely opens up the jacket to cool you down.  I thought there was a stowable hood hidden inside the collar, but I guess not.  Oh well.

I don't think I'd ever wear this jacket running, especially around here because I would die from heat exhaustion.  But I could definitely wear it as a street jacket on colder days here.  Also, I can wear it when I go snowboarding, though I haven't gone in like 2 years!  But if I were to go next winter, I'd have the perfect outfit for it.  Always good to plan ahead!  =)

Anyway, so happy I was able to get this jacket!  Sometimes waiting does pay off.  It must be meant to be!


Monday, July 4, 2011

Nike Free 3.0 V3 in Blue Glow!

I have been meaning to get a new pair of running shoes for a long time now.  I've been long due for a new pair of running shoes since I've been using my Mizuno Wave Nirvana 6 for over a year!  I was going to get the same pair again because I love them, but I recently decided to switch over to more of a barefoot running method.  I think I stomp too much when I run, and I've heard that this can be corrected by using barefoot type of shoes.  But I'm not quite ready for the Vibram 5 Fingers yet, partially because I think they look kind of silly so I need a transition shoe.  I've heard good things about the Nike Free versions as a good minimalist shoe, so today when I went to Beverly Hills to get Harajuku Crepes (only the best dessert place in town!!!), I decided to stop by Nike Town and give them a try.

I really liked the colors of the Nike Free 3.0 V3.  I guess V3 just came out very recently so there's really not much reviews about it yet.  But the previous versions seem to be very well received.  I normally get neutral colored workout shoes but I fell in love with the blue one they had.  The official color name is Blue Glow/Solar Red-Treasure Blue.  Maybe because today is 4th of July and I felt like getting red/white and blue!  So fitting.

Here's what they look like!  They are very bright and I think they look pretty true to real life color in these photos.  The stock photo on the Nike website is way muted.


So when I first put them on in the store and walked around in them, I couldn't believe how lightweight they were!  6.2 oz!  That is like the same weight as my dinner lol.  They are super duper comfortable.  Such a big difference from my Mizunos which are quite supportive and clunkier.  The Nike Free actually has more arch support than I thought it would.  I normally wear size 6 in shoes, but usually wear size 7 in workout shoes to allow swelling.  So I tried on size 7 in these and I think it was a good fit.  The sales girl said that these run pretty small, but I still had some extra room in the size 7.  

The tongue is attached to the rest of the shoe which felt weird at first!  I usually pull on the tongue of my shoes after putting them on, and I still do the same with these even though the tongue doesn't move.  It's a habit!  The upper mesh material is very soft and flexible, so it's pretty easy to squeeze your feet in and then pull the heel up.  I ran on the treadmill at the Nike store for like a lap at a jogging pace and they felt very comfortable.  I really wanted to run like 3 miles before committing to them but that would have been a little weird in the store.  Haha.  So, I don't know yet how they will do for a longer run, but I can't wait to try them out ASAP!  I heard that it is a good idea to take it easy with minimalist shoes at the beginning because you will use different muscles and will be very sore.  But I always have trouble taking it easy, so we'll see about that...  Good thing Nike has a good return policy so I can take them back within 30 days if I'm not satisfied with them.  

But I really think that if I end up hating them for running, I will most likely still keep them as walking shoes.  Because they feel like the most comfortable slippers!  And they look awesome with casual wear too.  I'm really in love with the vibrant color.  Though it will be hard to match my outfits to them.  But I couldn't bring myself to buy black or gray because that is just so boring.  I think blue will look really good with black or coal bottoms.  Then I guess I can rock the 80s look and have a completely offsetting colored top!  Hehe.

I will report back once I try them out for a while.

**See Update:  Review of these shoes here**


Sunday, July 3, 2011

Lululemon Astro Wunder Under Crop

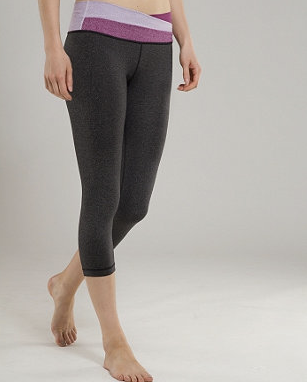
I went to the Lululemon store today to check out the new stuff.  I got tired of all the same products in similar colors and I have more than enough to last me a lifetime.  Seriously I just can't get that excited about new colors in a Cool Racerback or a Define Jacket.  All the "new" colors look exactly the same as old colors to me anyway!  So this was the first time I'd stepped foot into a store in a while.  I was really psyched to see the new Astro Wunder Under Crop though!  I loooove my Astro Crops because of the pretty waistband.  I also find the waistband to be stretchier and more forgiving.  So whenever I feel more bloated I reach out for my Astro crops.  I have 3 pairs and love them all dearly.  I've been meaning to get more Wunder Unders because I only have 2 pairs - one pair is actually the Wunder Grooves, and the other one is the denim Wunder Under.  So I wanted to get a regular luon pair.  I'm so glad I waited till the Astro Wunder Unders came out because they are the perfect combo!


I tried on both the Coal/Surge Wee Stripe in size 4 (my regular size) and the Heathered Black / Dew Berry in size 6 since they were out of size 4s.  I went with the heathered black.  I found that both sizes fit exactly the same though.  In fact, I found the waistband of the size 6 to be even a little tighter.  I actually had trouble with the waistband not laying flat with the size 4.  Very weird!  I asked the educator if it was because the heathered black material fits tighter than regular luon, she said no.  But I have my doubts, because I tried on the heathered black Define and it seems to be less stretchy than some other colors.  Not a big difference though.  Also, my coal luon Groove pants at home are also stretchier than black luon.  So that's the story I'm sticking with.

I like the waistband of Coal/Surge better, but I have so many coal bottoms and wanted something different.  That's why I got heathered black.  The waistband on these Astro Wunder Unders are definitely higher rise than my Astro Crops by at least an inch, so there's no way anyone can see the waistband with a shirt over anyway.  Plus I really like heathered black.  I also probably have more tops to match the dew berry color, like raspberry, potion purple, etc.

My Astro Crops are from the very first batch from like 2008 before they brought out the updated version, and the back of the waistband is all one layer.  The front has 3 layers like the current Astros in stores.  I actually prefer the old version over the different layers in the back because I've never had to pay attention to the waistband to make sure the material is not folded over wrong or overlapping.  It would always lay flat and it's just easier to manage.  Here's one of my Astro Crops for comparison - now only if fruity tootie would make a comeback....


Well I'll have to try on the Astro Wunder Unders in yoga or something and see how they do.  I don't currently have them because I needed to get them hemmed shorter.  By the way, I wanted them short enough to cut off the Lululemon logo on the lower left leg.  But they wouldn't let me saying that they are not allowed to cut off the logo.  I never knew that.  I distinctly remember that at another store a long time ago, an educator told me they could cut off the logo portion but did not carry extra logos to iron onto a different area of the pant.  Whatever.  I don't really care about logo on the leg, and you can barely see it against heathered black.  I just hope the length works because I really just wanted them to be long enough to go over my knee.  Now they are probably going to be an inch or so longer than I wanted.  We'll see!  I'm still excited to try them out though!

Oh yeah, the store also had a lone wren camo cool racerback in my size that looked like a pretty cool print.  Especially the reverse side is a really nice olive green that I would love to have.  I would have got it in a second but I hated the material.  It feels and looks like cheap polyester.  Well, it pretty much is polyester - I read the label, like 94% polyester.  I put it on and immediately wanted to take it off.  I wish it was soft and breathable.... I also thought about getting the new citron wee stripe cool racerback. I'm normally not a fan of horizontal stripes like the wee stripe and space dye prints.  But the citron one was pretty because it looks almost like a solid colored yellow tank.  And it felt much softer than the camo one.  But I decided for now I don't need any more racerback tanks!  Maybe I'll change my mind later.


Saturday, July 2, 2011

DIY Bridal Sash Project

I haven't written much this week because I've been busy working on my new DIY wedding project every night after work.  Let's just say I've been arts 'n crafts inspired.  My dress doesn't require a sash or anything, but my "bridesmaids" will.  Ok I say bridesmaids in quotes because I told my friends to wear whatever they want, and I'll just tie a sash around them to make it look more uniform.  I just don't want people to have to go buy matching dresses and go through all the hassle just because I decide to have a wedding.  I told them they can wear any solid colored rich jewel toned dress that they already have.  So far 2 of them have decided on their dresses - one is royal blue, and another is burgundy.  So I hope the other 2 (or maybe 1) wear like a rich jade color, and a color of another family so they can be completely different.  How great would that look in pictures??  I don't have a wedding color because I can't be bothered, so I decided to go for a neutral color as the sash - I chose champagne.  I think it will go with pretty much any color dress they get.

So at first I thought of just getting them a simple sash.  But then I thought why not put a little bit of decoration on the sash.  I looked on etsy and there's tons of different bridal sashes out there that people can make for you in different colors with some flowers or jewels on it.  But they kind of cost a lot - the absolute cheapest I found that wasn't butt ugly was $60.  And they don't even look that complicated to make on my own!  So I said F it, let me just take a stab at it myself.  After all, I just finished making my bouquet and it wasn't nearly as painful as I thought it would be!

I thought getting the right materials for the sash would be hard, but it was actually really really easy.  I just took a trip to Jo-Ann Fabric & Crafts and they had everything I could possibly need!  I got champagne colored organza for the flowers, and the exact same shade of satin ribbon (I got 2 inches wide, but 1.5 would probably work too) and thread.  I also got some shiny buttons for the center of the flowers, as well as some good scissors and I was good to go!  I was in and out of there within 20 minutes.  For all the material that I got, which was way more than I needed, it cost me $30.  Compare that to over $200 to pay someone to make me 4 sashes!  Ha!  I feel smart.  Lol.

Here are the 2 finished photos of what I made.  I will lay out the steps I used to make my flowers in case anyone is interested!  The first one I did on my own by trial and error (I basically tried to figure out how to make these flowers by staring intensely at some organza flowers I found on etsy).  The second one, I watched some YouTube videos which were helpful.  There are tons out there.  YouTube is a freaking life saver.  I can't believe so many nice people take the time to video tape, well, everything!


Ok, there they are!  The following are steps to making them, they are very very simple.  So read on if you are interested!

First one:

I cut a strip of my organza roughly about 4 inches wide.  Then I cut the strip into 4 X 4 squares like this:


Then I cut flower shapes out of the squares.  The petals can be any shape of course.  But I just opted for a simple regular flower petal for my guinea pig trial run.  I hand cut them, but I suppose to make them more uniform, you could draw a shape first then cut.  But I figure that natural flowers aren't perfect anyway, that's what gives them character! As you can see below, my shapes are kind of really not that pretty looking on their own.  Also, I tried to cut some bigger and some smaller ones, so that the finished product will look more natural.


Ok then you just keep cutting shapes and layering them.  I cut about 10-12 per flower, but if you want a fuller flower, just cut more!  You can stack the squares and cut a few at a time.  I cut one at a time at first and it took way too long!


Keep stacking and stacking...


See, even though the shapes are not perfect on their own, they look pretty good when they are all layered!

Then I just took out my needle and thread, and sewed the organza sheets together, including a shiny button on top as the center of the flower.


And there it is!  Done!  All I had to do next was sew it onto the ribbon.  I cut the ribbon to be about 2 meters long to give it enough room to tie around the waist.  If they end up being too long, I can just cut them.


I actually took a hot glue gun and glued some of the bottom layer - the one closest to the satin ribbon, onto the ribbon so that the flower doesn't droop when you put it on.  The organza sheets are very light, so if you don't do that, gravity will for sure pull them down.  

I made 2 of these flowers, and sewed the other one slightly above the first onto the ribbon.  Of course they could be even leveled and that would look great too.  I just wanted to try something different.  The placement of the 2nd flower was actually the hardest part for me.  I had to re-do it 3 times.  The first time I put it on the wrong side, and then 2nd time I put it too far away from the first flower and you could see some ribbon between the 2 flowers.  I didn't like that.  But 3rd time was a charm!  Here's what it looks like on me!  Not half bad for the first attempt, huh?  =)


After I made the first one, I decided it would be cool to make each sash a little different.  So everyone can be unique and it looks more modern.  This time I got smart and watched YouTube for tips before staring more at pictures on etsy.

Second sash:

The beginning is very similar to the first one - I cut out strips from the organza and cut them into 4 X 4 squares.  Then I cut flower shapes out of them.  Again, they don't have to be perfect at all.  I used about 12-15 sheets per flower this time.  I don't have any pins, so I put my needle through the stacks of organza to keep them in place while cutting.  See the stack on the right.


And then I layered the 2 stacks I cut out, and ran my needle and thread through the center.


Then I twisted around the different layers of organza with the thread through, so that they are not perfectly stacked.  And then I folded it into half and gave it a few stitches:


Then, I folded it perpendicularly to the first fold, and gave another few stitches.  The whole point of this is to sort of scrunch up the organza sheets from the bottom so that the petals will stand up and become more 3D.


I actually then repeated some more stitches on the other side, whatever you want, as long as it looks good when flipped over.  Here's what mine looks like!  Just be sure to play with the petals and make sure their placement looks natural and effortless.


So I just repeated the steps and made a 2nd flower just like this.  Then I sewed them onto the satin ribbon.  I also used my hot glue gun and glued the bottom of the flowers onto the ribbon.  This flower doesn't have a flat bottom like the first one, since I had scrunched it and sewn the bottom so it formed a point.  That's why it was more important to glue it to make sure it doesn't fall to one side.

This is what the finished product looks like on me.  This time I made sure I paid closely attention to the placement of the 2nd flower so that it was the same level and close enough to the first one.  I only had to sew it on once!  Score!


So I really like my sashes!  I hope my friends will too.  If they don't, then they can forget about being my bridesmaids in quotes.  Hahaha.  But seriously, this was so easy to do and saves so much money.  I will have lots of organza and ribbon left over, so I will be making more flowers during holidays/birthdays as decorations for presents!  It's a nice touch.  I love my new found love for arts and crafts!  Oh, maybe I'll start selling sashes and bouquets on etsy too.  Undercut others by $5-10 and probably can sell a few.  That's still a huge profit margin.  LOL!  

I also think I can make more flowers for myself as hair accessory for the wedding as well.  I like the look of the flowers on the 2nd sash for hair.  They look just like some hair fascinators I have seen that cost over $100 retail.  I love the soft and romantic feel.  All I have to do is glue a clip to the back of the flower and put it in my hair for less than $1.  There's so many different ways to make them and use them, the possibilities are endless.  

I will cut out different shaped petals for my next 2 sashes, and hopefully create different looks!  Maybe I'll attempt to create roses (they look a little harder per YouTube tutorials).  I will post more then.  
Related Posts Plugin for WordPress, Blogger...